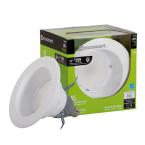
So far only two. In all sizes, we carry the lower (and warmer) 2700K temperature soft white. Click below for more information.
Let me know if you have any additional questions,
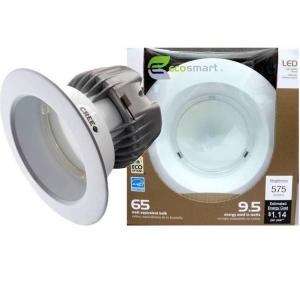
No matter which housing diameter you pick, all with be a 65 watt equivalent. Equally important as that, these do come in various color temperatures and sizes, which leads to….
While IC refers to rating of the housing having insulation touching it, Air-Tite refers to a design element that prevents airflow between the attic and existing living spaces. When you do decide to purchase recessed lighting, be sure to check on the housing whether it says IC-rated (usually a solid aluminum silver finish; an all white finish usually denotes its NON-IC rated) and that is Air-Tite. Youll need to purchase Air-Tite trims to go along with your can housing to ensure no drafts (heat/air loss) will occur, thereby saving on your energy bill!
Therefore, Ive broken down the 4 main ways you can approach planning out the kind of lighting youll need for your home:
However, newer dimmers are in our stores and out on the market today that are made for incandescent as well as LED and CFL lighting. Make sure the new dimmer you buy is capable of this, as the fixtures are fully dimmable.
pA few questions about EcoSmart 9.5 watt downlight kit for recessed lighting housings:/polliWhat is the equivalent/comparable incandescent wattage?/liliWhat color temperature choices are available?/liliAre these lamps dimmable with a conventional dimmer?/liliThere is no heat insulation involved in this proejct, but is there a good reason to use an airtight housing instead of a non-ic housing?/liliWhat trim diamters are available? Large project. I need 6 in uor/u 5 in, uplus/u 3 inch uand/u 4 inch/li/ol
2. How to Select Your Housing (Can) Type
We also carry the higher (and brighter) 5000K daylight version. Click on the image below for more information.
Are these lamps dimmable with a conventional dimmer?
And there you have it, how to successfully choose the right recessed lighting for your home. Hopefully with this information, this has assisted you in making the best choice for your lights in and outside of your home.
Having knowledge of the kinds of lighting applications for your home, its time to plan out where and how many recessed lights youd like to install. The basic rule of thumb I have traditionally seen is placing recessed lights no greater than 6 feet apart. They key thing at this stage is the visual planning. Take note of where on the ceilings youd want the future fixtures to be, and be aware of how you are going to get accessibility to power up everything
You will need to cut holes into the joists to accommodate the wires to run through it. At this stage, working with a longflex bithelps you to not have to cut additional holes into your ceiling for the electrical work.
I will attempt to answer your questions regarding EcoSmart LED downlight kits for recessed lighting in the manner you asked them.
In between floors usually calls for 8 inches of clearance space, so make sure your recessed fixture will accommodate this. To check the height of your clearance, you can cut a hole in the ceiling and measure it with a piece of wire. If you have less than 8 inch height, be sure to purchaselow clearance aka shallow housing. Also, youll need to make sure the fixture has proper clearing between the joists, so tracking down where they are with astud finderwill assist you greatly in the install. After getting your remodeling housing, affix the template to the ceiling with tape, so you can see exactly where you are cutting.
2. What color temperature choices are available?
At this stage in planning, youll most likely need to consider how muchelectrical wireyoull need for the job, as well as installingdimmersto control your lights. Always pay close attention to amperages and wattages when it comes to adding or doing new work in your home, preventing any overloads on a circuit. Be sure to add up all the lights total wattage and always have the proper wire, connections, and fasteners for the installation to be effective and safe. By identifying and planning out where your recessed lights are going to be, you are ready for the next step.
Examples: kitchen island/bathroom counter/above the stove
pHello Bibbilator,/p p/p pThanks for your questions and for joining us here on the community!/p p/p pI will attempt to answer your questions regarding EcoSmart LED downlight kits for recessed lighting in the manner you asked them./p p/p ollistrongWhat is the equivalent/comparable incandescent wattage?/strong/li/ol pNo matter which housing diameter you pick, all with be a 65 watt equivalent. Equally important as that, these do come in various color temperatures and sizes, which leads to…./p p/p p/p pstrong2. What color temperature choices are available?/strong/p p/p pSo far only two. In all sizes, we carry the lower (and warmer) 2700K temperature soft white. Click below for more information./p pa href= target=_selfimg src= border=0 alt=6 in. 9.5-Watt (65W) Soft White (2700K) LED Downl
– When you want to draw attention to an object or design element.
When it comes to planning out where you want your recessed lights to go, youll also need to consider how and why you want those areas to be lit. For example, youll need a much more open light to give proper illumination for a kitchen, but it would be too much for a fireplace that you just want to highlight.
There is no heat insulation involved in this proejct, but is there a good reason to use an airtight housing instead of a non-ic housing?
In terms of the trim to use will depend on what we discussed in part; your lighting application. Below are the most common ones found at your local store.
A few questions about EcoSmart 9.5 watt downlight kit for recessed lighting housings:
You can install recessed lights in all rooms of your home, giving the exact lighting you need for any given space.
It looks like a big project alright…you want all the sizes we carry!
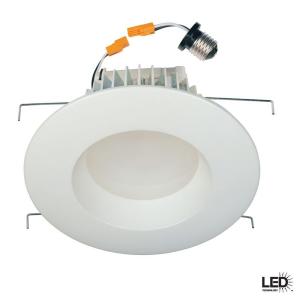
hese come in the same appearance and color temperature as the EcoSmart line. However, our 6 inch recessed white LED retrofit trim (shown below) can fit into 5 inch housings as well.
3. Selecting Your Housing (Can) Size
Theres always a good reason to have an airtight housing versus a non-ic housing. They eliminate drafts and help with your heating bill, plus non-ic recessed housings arent even commonly sold nowadays.
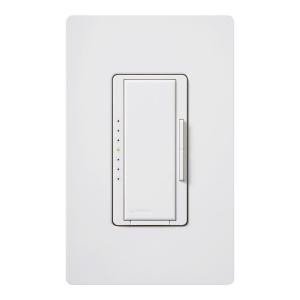
No, at least in the sense of a dimmer that is rated only for incandescent/halogen bulbs.
Now that youve picked out the light, you will now need to pick out the correct light bulb. Depending on what size housing and trim you purchased will determine the kind of bulb youll need. Luckily, there is always a listed sticker on the trim as well as the housing to eliminate any guesswork when it comes to wattages and sizes of the light bulb to get. Never exceed your wattage or put in another shape bulb that is not shown on the fixture sticker, failure to do so can lead to a fire hazard.
One dimmer that is rated for LED bulbs is linked and shown below.
If you do have access to the ceiling, if its exposed joists or you get to it from the attic above, you can use new construction housing. This kind of recessed lighting housing is installed by nailing in the adjustable brackets provided with the fixture. A few of our in-stock recessed housings have features such as nails already on the brackets and wire holders that securely hold the electrical cable in place even after the install is done. Shown in an Air-Tite model below, this is a very efficient light housing.
Examples: above fireplaces and wall hangings
Thats not to say that you may have it already in your ceiling. With the gasket seal that comes with each trim housing, this actually gives you draft protection in case you dont have airtight housing. In either case, using these trim fixtures are a win-win situation for stopping drafts.
At this stage, youll need to ask yourself2 questionswhen it comes to putting in recessed lights.
What trim diamters are available? Large project. I need 6 in
Keep in mind that when it comes to choosing and installing your new recessed lighting, always refer to your local electrical codes and consult a licensed local electrician in your area for any specific wiring questions. Even before you get to the planning stage of wiring up your lights, always make sure that you turn power off at the circuit panel when working with any electrical job.
Examples: living room/den/family room/hallway/stairs
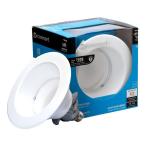
The EcoSmart line of LED downlights at this time are only available in the 6 inch (linked above) and 4 inch housings (shown and linked below).
While you may not know the answer to this if you dont have ceiling access, going with a IC (Insulation Contact) Housing is a safe bet over the NON-IC (Non-Insulation Contact) version. In fact, our stores mainly carry IC-rated and Air-Tite can types. While you may not need Air-Tite or a IC rated housing, it can and will help you in the long run.
Depending on what lighting needs and preference you have will determine which color to choose.
Be aware when choosing recessed housings, that some are sold with the trim and housing sold together in a kit. Also, consider purchasing a kit that containsboth the trim and housing together. If it is the trim you like, this can save you time and money when it comes to installing new lights.
Examples: Bookcase/entertainment center/artwork
Give yourself a little over an extra foot of wire to allow for easy connections and afterwards you simply snap in the housing with the clips located on the bottom of the can, shown in the remodeling housing above. It provides a very firm and secure install.
Lastly, we have a video on our EcoSmart line of LED downlights in a short video below.
What color temperature choices are available?
4. There is no heat insulation involved in this project, but is there a good reason to use an airtight housing instead of a non-ic housing?
Next, carefully cut the outline of the template, either with a drywall saw or a hole-cutting saw. No matter which option you choose, be sure not to cut over the manufacturers instructions, as this could lead to the fixture not mounting properly.
1. How to Identify and Plan Your Lighting Application
Lastly, consider another trim that I havent mentioned yet. It is less than a year old on our shelves, but its already making a big impact in the industry. That would be using anLED 9.5 Watt Downlight replacement trim. It replaces or can be used as a 6 trim, but this has the LED light already included. It lasts 35,000 hours and is great for areas that are very high or inaccessible to change out the bulbs every time they go out. Compare that to incandescent recessed lighting bulbs that last only 3000 hours! Only this kind of trim/light alongside the shower lens trim are the only 2 that are rated for exterior use, as the gasket inside the trim will block any moisture from coming in. Below are some specs as well as a link that will take you to a demonstration video showing the features of this amazing product.
What is the equivalent/comparable incandescent wattage?
– This kind of lighting gives uniform light patterns that are bright and comfortable, you could call this really your everyday light.
The purpose of this post is to inform you of 4 key takeaways that will get you started when it comes to choosing recessed can lights:
Keep in mind that with either type of housing, that it is up to you if you would like to purchase the trims together all at once, or at a later date. Some kits do have the trim and light bulbs included, but its something to consider.
One of the benefits of recessed lighting is the versatility that it can bring to illuminating an area. Chandeliers can bring a nice focal point to a dining room or entrance to a home, and shoplights can give great task lights, but recessed can lights are able to do all this and much more.
At this time, the only 5 inch recessed trims we carry are in our in-house brand, Commercial Electric.
2. Will the housing be in direct contact with insulation?
– use this kind of light when you want to emphasize vertical surfaces.
– The working-with-you light as I like to call it; used to accomplish a specific task.
While this can be a simple DIY project, The Home Depot can install recessed lighting for you if you feel you cant tackle this project by yourself. Our licensed and insured electricians can do any electrical job in and outside your home.
Were almost done! Depending on what kind of trim you buy will depend on how it is installed. For most 4-6 inch housings, the trims are installed 2 ways, either by a coil spring or by squeezable rod springs, shown below.
Today Id like to go over on of the best ways to illuminate inside (and sometimes outside) your home by way of usingAlso known as can lighting, this type of lighting fixture is always a perennial favorite with customers and contractors. Whether you are in the market for a new home, or you just want to update your lighting with remodeling, using recessed lighting is really the way to go. This kind of lighting is popular due to the fact that the fixtures are recessed, or installed into the ceiling and not surface mounted, leaving you with a clean and sharp light without seeing the entire fixture.
If you do not have access to the ceiling, the drywall or another substrate is already there, you can use remodeling housing. This kind of fixture works by cutting a hole in the ceiling (template is provided w/ housing).
3. Are these lamps dimmable with a conventional dimmer?
If you are in the middle of construction work in the room where the trims are going to be placed, Id highly recommend to install the trims after all drywall and painting has been completed. In fact, most housings have a red cap that allows for paint overspray.
Thanks for your questions and for joining us here on the community!
pHelloeveryone,/p p/p pToday Id like to go over on of the best ways to illuminate inside (and sometimes outside) your home by way of usingfont color=ff6600stronga title=Recessed Lighting from The Home Depot href= target=_selffont color=ff6600recessed lighting/font./a/strong/fontAlso known as can lighting, this type of lighting fixture is always a perennial favorite with customers and contractors. Whether you arein the market for a new home, or you just want to update your lighting with remodeling, using recessed lighting is really the way to go. This kind oflighting is popular due to the fact that the fixtures are recessed, or installed into the ceiling and not surface mounted, leaving you with a clean and sharp light without seeing the entire fixture./p p/p pYou can install recessed lights in all rooms of your home, giving the exact lighting you need for any given space./p pa href= target=_selfimg align=center src=/howto/servlet/rtaImage?eid=06GQfeoid=Bodyrefid=0EM5000000009ML border=0 alt=Recessed Lighting from The Home Depot title=Recessed Lighting from The Home Depot width=454 height=199/img/a/p p/p pThe purpose of this post is to inform you of 4 key takeaways that will get you started when it comes to choosing recessed can lights:/p p/p ollistrongfont size=3 color=993300How to Identify and Plan Your Lighting Application/font/strong/lilistrongfont size=3 color=993300How to Select Your Housing (Can) Type/font/strong/lilistrongfont size=3 color=993300Selecting Your Housing (Can) Size/font/strong/lilistrongfont size=3 color=993300Selecting Your Trim/font/strong/li/ol pKeep in mind that when it comes to choosing and installing your new recessed lighting, always refer to your local electrical codes and consult a licensed local electrician in your area for any specific wiring questions. Even before you get to the planning stage of wiring up your lights, always make sure that you turn power off at the circuit panel when working with any electrical job./p pimg align=center src=/howto/servlet/rtaImage?eid=06GQfeoid=Bodyrefid=0EM5000000009MM border=0 alt=turn off power at main circuit panel title=turn off power at main circuit panel width=454 height=231/img/p p/p pWhile this can be a simple DIY project, The Home Depot can install recessed lighting for you if you feel you cant tackle this project by yourself. Our licensed and insured electricians can do any electrical job in and outside your home./p pa href= target=_selfimg align=center src=/howto/servlet/rtaImage?eid=06GQfeoid=Bodyrefid=0EM5000000009MN border=0 alt=Electrical Services by The Home Depot title=Electrical Services by The Home Depot width=452 height=144/img/a/p p/p pWith that said…lets get started!/p p/p pustrongfont size=3 color=9933001. How to Identify and Plan Your Lighting Application/font/strong/u/p p/p pOne of the benefits of recessed lighting is the versatility that it can bring to illuminating an area. Chandeliers can bring a nice focal point to a dining room or entrance to a home, and shoplights can give great task lights, but recessed can lightsare able to do all thisand much more./p p/p pWhen it comes to planning out where you want your recessed lights to go, youll also need to consider how and why you want those areas to be lit. For example, youll need a much more open light to give proper illumination for a kitchen, but it would be too much for a fireplace that you just want to highlight./p p/p pTherefore, Ive broken down the 4 main ways you can approach planning out the kind of lighting youll need for your home:/p p/p olliustrongGeneral/strong/u- This kind of lighting gives uniform light patterns that are bright and comfortable, you could call this really your everyday light.emExamples: living room/den/family room/hallway/stairs/em/liliustrongAccent/strong/u- When you want to draw attention to an object or design element.emExamples: Bookcase/entertainment center/artwork/em/liliustrongTask/strong/u- The working-with-you light as I like to call it; used to accomplish a specific task.emExamples: kitchen island/bathroom counter/above the stove/em/liliustrongWall Wash/strong/u- use this kind of light when you want to emphasize vertical surfaces.emExamples: above fireplaces and wall hangings/em/li/ol pHaving knowledge of the kinds of lighting applications for your home, its time to plan out where and how many recessed lights youd like to install. The basic rule of thumb I have traditionally seen is placing recessed lights no greater than 6 feet apart. They key thing at this stage is the visual planning. Take note of where on the ceilings youd want the future fixtures to be, and be aware of how you are going to get accessibility to power up everything/p p/p p/p pimg align=center src=/howto/servlet/rtaImage?eid=06GQfeoid=Bodyrefid=0EM5000000009MO border=0 alt=proper spacing of recessed lighting title=proper spacing of recessed lighting width=451 height=235/img/p pAt this stage in planning, youll most likely need to consider how muchstrongfont color=ff6600a title=The Home Depots Non-Metallic Wiring Selections href= target=_selffont color=ff6600 electrical wire/font/a/font/strong youll need for the job, as well as installing strongfont color=ff6600a title=The Home Depot Dimmers Main Page href= target=_selffont color=ff6600dimmers/font/a/font/strong to control your lights. Always pay close attention to amperages and wattages when it comes to adding or doing new work in your home, preventing any overloads on a circuit. Be sure to add up all the lights total wattage and always have the proper wire, connections, and fasteners for the installation to be effective and safe. By identifying and planning out where your recessed lights are going to be, you are ready for the next step./p p/p pustrongfont size=3 color=9933002. How to Select Your Housing (Can) Type/font/strong/u/p p/p pAt this stage, youll need to ask yourself font size=3strong2 questions/strong/font when it comes to putting in recessed lights./p p/p p/p pstrong style=font-size: medium;1. Do you have ceiling access?/strong/p pstrong style=font-size: medium;br/strong/p pIf you do have access to the ceiling, if its exposed joists or you get to it from the attic above, you can use new construction housing. This kind of recessed lighting housing is installed by nailing in the adjustable brackets provided with the fixture. A few of our in-stock recessed housings have features such as nails already on the brackets and wire holders that securely hold the electrical cable in place even after the install is done. Shown in an Air-Tite model below, this is a very efficient light housing./p pa href= target=_selfimg align=center src=/howto/servlet/rtaImage?eid=06GQfeoid=Bodyrefid=0EM5000000009MP border=0 alt=New Construction Recessed Housing title=New Construction Recessed Housing width=452 height=172/img/a/p p/p pIf you do not have access to the ceiling, the drywall or another substrate is already there, you can use remodeling housing. This kind of fixture works by cutting a hole in the ceiling (template is provided w/ housing)./p pa href= target=_selfimg align=center src=/howto/servlet/rtaImage?eid=06GQfeoid=Bodyrefid=0EM5000000009MQ border=0 alt=Remodeling Recessed Housing title=Remodeling Recessed Housing width=454 height=306/img/a/p pIn between floors usually calls for 8 inches of clearance space, so make sure your recessed fixture will accommodate this. To check the height of your clearance, you can cut a hole in the ceiling and measure it with a piece of wire. If you have less than 8 inch height, be sure to purchasefont color=ff6600stronga title=6 in. Recessed Lighting Housing href= target=_selffont color=ff6600 low clearance aka shallow housing/font/a/strong/font. Also, youll need to make sure the fixture has proper clearing between the joists, so tracking down where they are with a font color=ff6600a title=Stud Finder Selection by The Home Depot href= target=_selffont color=ff6600stud finder/font/a/font will assist you greatly in the install. After getting your remodeling housing, affix the template to the ceiling with tape, so you can see exactly where you are cutting./p p/p pNext, carefully cut the outline of the template, either with a drywall saw or a hole-cutting saw. No matter which option you choose, be sure not to cut over the manufacturers instructions, as this could lead to the fixture not mounting properly./p pimg align=center src=/howto/servlet/rtaImage?eid=06GQfeoid=Bodyrefid=0EM5000000009MR border=0 alt=2 options to cut into a ceiling title=2 options to cut into a ceiling width=450 height=268/img/p pYou will need to cut holes into the joists to accommodate the wires to run through it. At this stage, working with a long strongfont color=ff6600a title=Klein Tools 3/4 in. x 72 in. Flex Bit Auger href= target=_selffont color=ff6600flex bit /font/a/font/stronghelps you to not have to cut additional holes into your ceiling for the electrical work./p p/p pGive yourself a little over an extra foot of wire to allow for easy connections and afterwards you simply snap in the housing with the clips located on the bottom of the can, shown in the remodeling housing above. It provides a very firm and secure install./p p/p pKeep in mind that with either type of housing, that it is up to you if you would like to purchase the trims together all at once, or at a later date. Some kits do have the trim and light bulbs included, but its something to consider./p p/p pstrongfont size=32. Will the housing be in direct contact with insulation?/font/strong/p pstrongfont size=3br/font/strong/p pimg align=center src=/howto/servlet/rtaImage?eid=06GQfeoid=Bodyrefid=0EM5000000009MS border=0 alt=be sure to find out if your ceiling has insulation in it title=be sure to find out if your ceiling has insulation in it width=443 height=189/img/p pWhile you may not know the answer to this if you dont have ceiling access, going with a IC (Insulation Contact) Housing is a safe bet over the NON-IC (Non-Insulation Contact) version. In fact, our stores mainly carry IC-rated and Air-Tite can types. While you may not need Air-Tite or a IC rated housing, it can and will help you in the long run./p p/p pWhile IC refers to rating of the housing having insulation touching it, Air-Tite refers to a design element that prevents airflow between the attic and existing living spaces. When you do decide to purchase recessed lighting, be sure to check on the housing whether it says IC-rated (usually a solid aluminum silver finish; an all white finish usually denotes its NON-IC rated) and that is Air-Tite. Youll need to purchase Air-Tite trims to go along with your can housing to ensure no drafts (heat/air loss) will occur, thereby saving on your energy bill!/p p/p p/p pustrongfont size=3 color=9933003. Selecting Your Housing (Can) Size/font/strong/u/p p/p pOnce youve established where and what kind of housing type youll need, now you can decide on what size housing youd like to get. This is the part of the process where it comes down to personal preference, so Ill break each of the 4 most common sizes we sell.img align=center src=/howto/servlet/rtaImage?eid=06GQfeoid=Bodyrefid=0EM5000000009MT border=0 alt=recessed housing sizes title=recessed housing sizes width=489 height=219/img/p p/p pBe aware when choosing recessed housings, that some are sold with the trim and housing sold together in a kit. Also, consider purchasing a kit that contains font color=ff6600a rel=nofollow href= target=_selffont color=ff6600both the trim and housing together/font/a/font. If it is the trim you like, this can save you time and money when it comes to installing new lights./p p/p pustrongfont size=3 color=9933004. Selecting Your Trim/font/strong/u/p p/p pWere almost done! Depending on what kind of trim you buy will depend on how it is installed. For most 4-6 inch housings, the trims are installed 2 ways, either by a coil spring or by squeezable rod springs, shown below./p pimg align=center src=/howto/servlet/rtaImage?eid=06GQfeoid=Bodyrefid=0EM5000000009MU border=0 alt=springs on recessed trims title=springs on recessed trims width=440 height=512/img/p pIf you are in the middle of construction work in the room where the trims are going to be placed, Id highly recommend to install the trims after all drywall and painting has been completed. In fact, most housings have a red cap that allows for paint overspray./p p/p pIn terms of the trim to use will depend on what we discussed in part; your lighting application. Below are the most common ones found at your local store./p pimg align=center src=/howto/servlet/rtaImage?eid=06GQfeoid=Bodyrefid=0EM5000000009MV border=0 alt=trim selections title=trim selections width=452 height=543/img/p pNow that youve picked out the light, you will now need to pick out the correct light bulb. Depending on what size housing and trim you purchased will determine the kind of bulb youll need. Luckily, there is always a listed sticker on the trim as well as the housing to eliminate any guesswork when it comes to wattages and sizes of the light bulb to get. Never exceed your wattage or put in another shape bulb that is not shown on the fixture sticker, failure to do so can lead to a fire hazard./p pimg align=center src=/howto/servlet/rtaImage?eid=06GQfeoid=Bodyrefid=0EM5000000009MW border=0 alt=different trims require different bulbs title=different trims require different bulbs width=428 height=185/img/p p/p pLastly, consider another trim that I havent mentioned yet. It is less than a year old on our shelves, but its already making a big impact in the industry. That would be using an font color=ff6600a title=EcoSmart 6 in. 9.5 Watt LED Downlight Trim href= target=_selffont color=ff6600LED 9.5 Watt Downlight replacement trim/font/a/font. It replaces or can be used as a 6 trim, but this has the LED light already included. It lasts 35,000 hours and is great for areas that are very high or inaccessible to change out the bulbs every time they go out. Compare that to incandescent recessed lighting bulbs that last only 3000 hours! Only this kind of trim/light alongside the shower lens trim are the only 2 that are rated for exterior use, as the gasket inside the trim will block any moisture from coming in. Below are some specs as well as a link that will take you to a demonstration video showing the features of this amazing product./p pa rel=nofollow href= target=_selfimg align=center src=/howto/servlet/rtaImage?eid=06GQfeoid=Bodyrefid=0EM5000000009MX border=0 alt=EcoSmart LED Downlight title=EcoSmart LED Downlight width=449 height=106/img/a/p p/p p/p pAnd there you have it, how to successfully choose the right recessed lighting for your home. Hopefully with this information, this has assisted you in making the best choice for your lights in and outside of your home./p p/p pstrongfont color=000000font color=ff6600a/fontboveaveragejoe/font/strong/p
5. What trim diameters are available? Large project. I need 6 inor5 in,plus3 inchand4 inch