While you are looking at the camera display of the coin, adjust the light, until the coin highlights fall in a pleasing manner to you.
Belowimages were cropped, but otherwise unaltered and were taken using an
In the first image I realized after I took the picture, that the coin was not aligned properly. It appears slightly rotated, which detracts from the image. The image can be rotated later with imaging software, but its quicker to shoot it correctly in the first place.
A couple of words about tripods/copystands and close-up photography. Use one. As you get closer to an object any motion of the camera is greatly magnified. Even a surgeon probably doesnt have hands steady enough to take a good coin photo without using a tripod or copystand. A sturdy tripod or copystand is essential for sharp images.
highly recommended for product photography
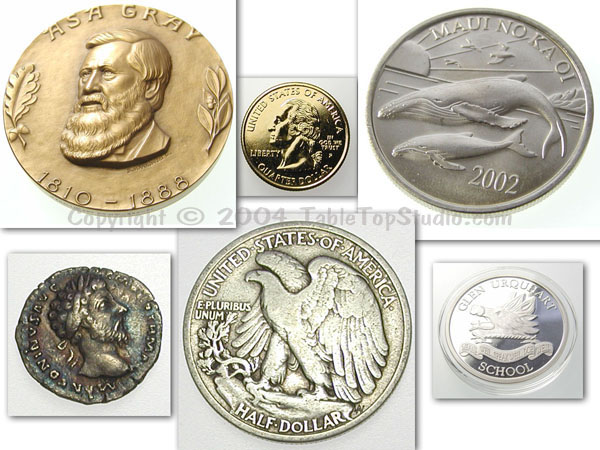
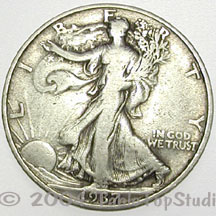
A shadowless image of an ancient coin on a light panel
Once you have the settings and exposure looking good for one side, its best to shoot the reverse side while you remember your settings.
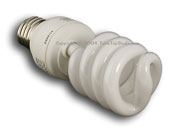
The compact fluorescent bulb used in these photos, matches the color temperature of the light panel. They are both 5000k-color temperature, and closely match the color of natural daylight.
And while you have your cameras manual out you should find out how to put the camera in spot focus mode. The normal focus mode of most digital cameras is some sort of average focus mode. That means that the camera will try to look at an area and base the focus on an area of what it sees. Its better for close up photography to put the camera into spot focus mode, this will allow you to see exactly what the camera will be focusing on.
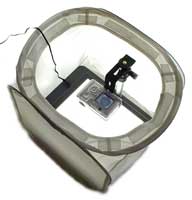
Typical set-up shows how the copystand and light panel fit neatly inside of the micro size EZcube.
aking good quality pictures of coins can seem intimidating. However, there are some simple techniques which even amateur photographers can use to obtain dramatic results with minimal effort. The following examples show the basic setup that should allow anyone to achieve results they can be proud of.
Place your coin on the light panel, and view it through your digital camera display. Wear your gloves to rotate the coin until it is aligned properly within the display. The use of a light panel for the background completely eliminates background shadows, and makes it super easy to completely strip out the background later if thats your goal.
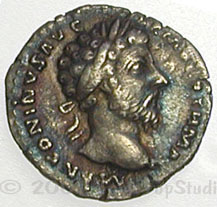
In the first image the exposure was set to E.V. -1.0. Its just too dark, and I was not happy with the two dimensional effect, for my glamour shot.
Now lets look at some specific situations.
Shoot a few different exposures, and be sure to use your self-timer, or remote control and a tripod to prevent any un-intentional camera motion caused by physically pushing the button.
Keeping a photo diary of successful set-ups and settings is a great idea. It will save you time in the long run, when you shoot similar coins down the road.
One way to ensure you get the best exposure is to take at least three pictures. The first exposure using the default camera setting of (0). The second, exposure is increased by (+) to make the image lighter. For the third, exposure is decreased (-) to make it darker.
These images were all taken using an inexpensive two megapixel digital camera. To simplify our setup we used anEZcoin Pro Studio kitwith anilluminated flat panelto provide a completely, clean, shadow free background. We used an inexpensive desk lamp as the light source, replacing the bulb with a true color daylight balanced compact fluorescent bulb as the main light source. (More details on the equipment can be found at the end of this page).
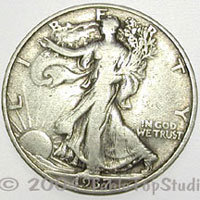
The second image is set to the cameras default setting of E.V. 0.
In the third image, I tilted the camera view a tiny bit, just to reveal the edge of the coin and add a little depth to the image. I also bumped up the E.V. to +1.0 for brightness.
More dimension is perfect for an auction gallery
In order to capture the most detail you will need to get your camera close to the coin. This means you will need to use a camera that has the ability to focus on very close objects (professional photographers call this macro focus).
For soft, diffused lighting, softer shadows, and reflection control.
We mentioned above thatthe other key to good coin photography is the lighting.You have probably already discovered that unless you are using a special ring flash, an on-camera flash does not lead to good coin photos. Not only is the cameras flash too bright at such a close distance, but it is probably in the wrong position to actually light up the coin properly. On camera flashes were designed for medium range shots, not extreme close-ups. The good news is that because the camera is so close to the coin and because you are using a tripod, you can use a relatively weak light for coin photography. We prefer daylight balanced compact fluorescent bulbs. Not only do they provide nice natural colored light, but they produce very little heat so they can be left on for long photo sessions without heating the coin, the camera or the photographer. Compact fluorescent bulbs fit in standard light fixtures, so a simple adjustable desk lamp fitted with a daylight balanced compact fluorescent bulb makes an excellent (and very low cost) light source for coin photography. (If you cant locate a daylight balanced compact fluorescent bulb, you can use a standard 60 watt light bulb. However you will need to compensate for the yellowish color cast it will produce. You can compensate for the color either with your cameras white balance (WB) setting or with imaging software).
Getting the camera to focus properly on the coin entails some effort, but the results should be worth it. A final word on focus. The above steps assume that you are using your cameras auto focus feature. However, ff you have followed the above steps (dont get closer than the minimum focus distance, set the camera to macro mode, and use spot focus) and you still have trouble getting the coin in focus, try focusing you camera manually. You may find that with your camera manual focus, is faster and more dependable than auto focus.
Use an illuminated flat panel for a shadowless image
Most digital cameras allow for focusing at less than 12 and some allow the object to be as close as 2 and still be in focus. You should consult your cameras users manual to see how close your camera can actually focus. Keep in mind that in order to focus close, the camera will need to be in macro mode and the zoom will need to be set to a medium or wide angle (again you will need to consult your cameras users manual to find the correct settings). Make sure you dont position the camera so the coin is closer than the minimum focusing distance of your camera, otherwise the image will never be in focus.